How to Sew a Concealed Top Zipper Its Sew Easy
Sewing an invisible zip can seem like an intimidating task with a number of problems to overcome. How do you avoid that nasty bubble at the end of the zip and what about sewing around the zip pull at the end? In this tutorial we'll show you a magical method that will solve all of these sewing problems and guarantee great results every time.
Preparing the Seam and Zip
This method of invisible zip insertion requires an invisible zip that is 3" longer than the finished zip length.
First prepare the centre back seam of your garment. Finish the raw edges of the seam allowances with your preferred method and consider applying interfacing to the seam allowances if the fabric is lightweight.
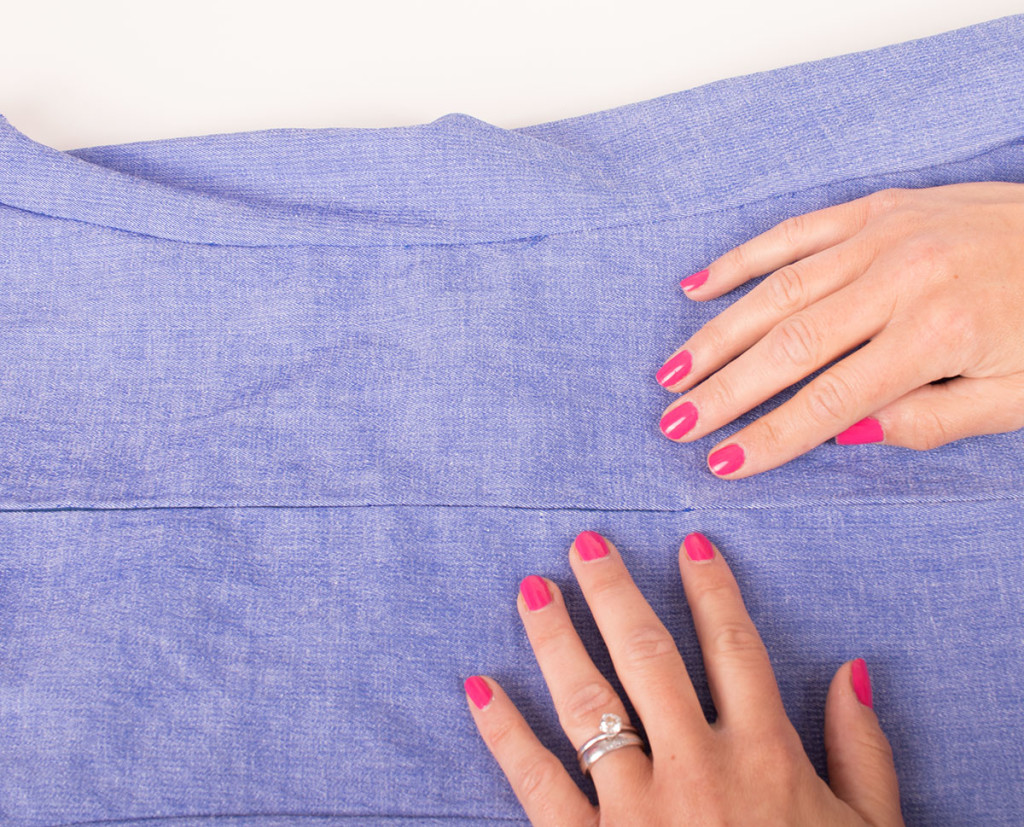
Sew a long basting stitch where the zip will be positioned. Next back tack and sew with a normal stitch length beyond this point and to the hem.

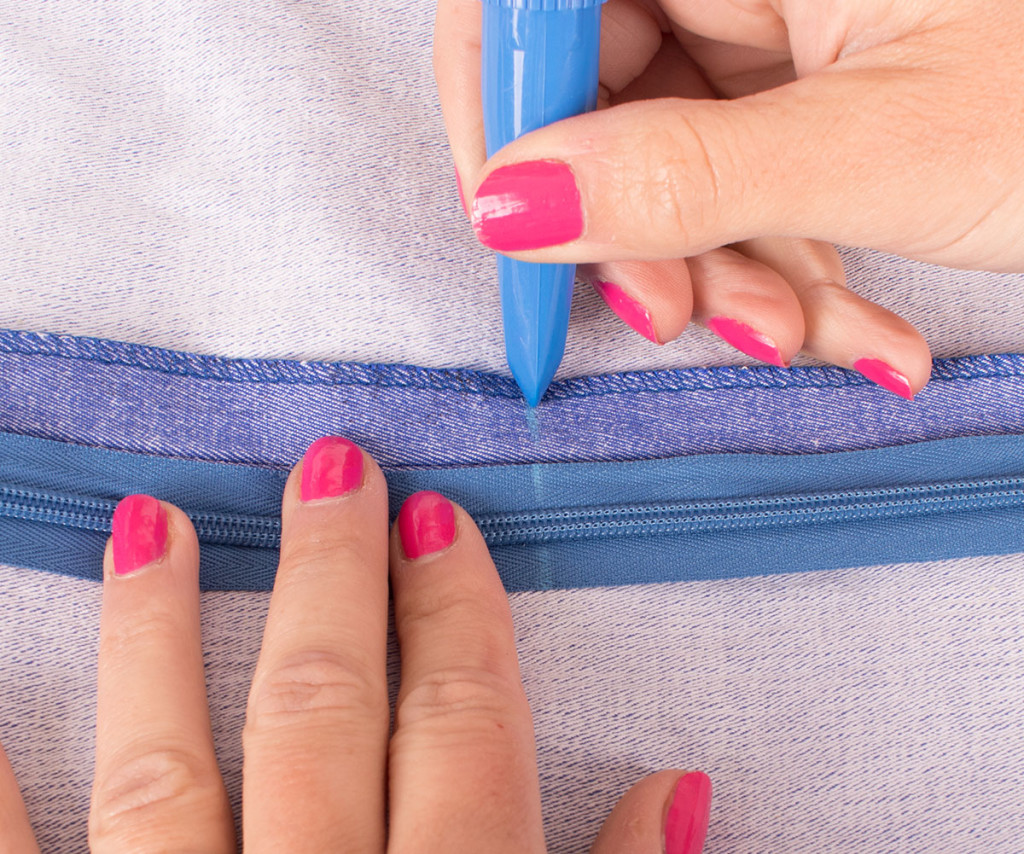
Press the seam allowances open and use tailors chalk or a chaco pen to mark the point where your zip will start at the top. How far down the zip needs to be depends on the thickness of the fabric and how the neckline will be finished. Here I am working with denim so have positioned the zip to allow for the thickness of the fabric.
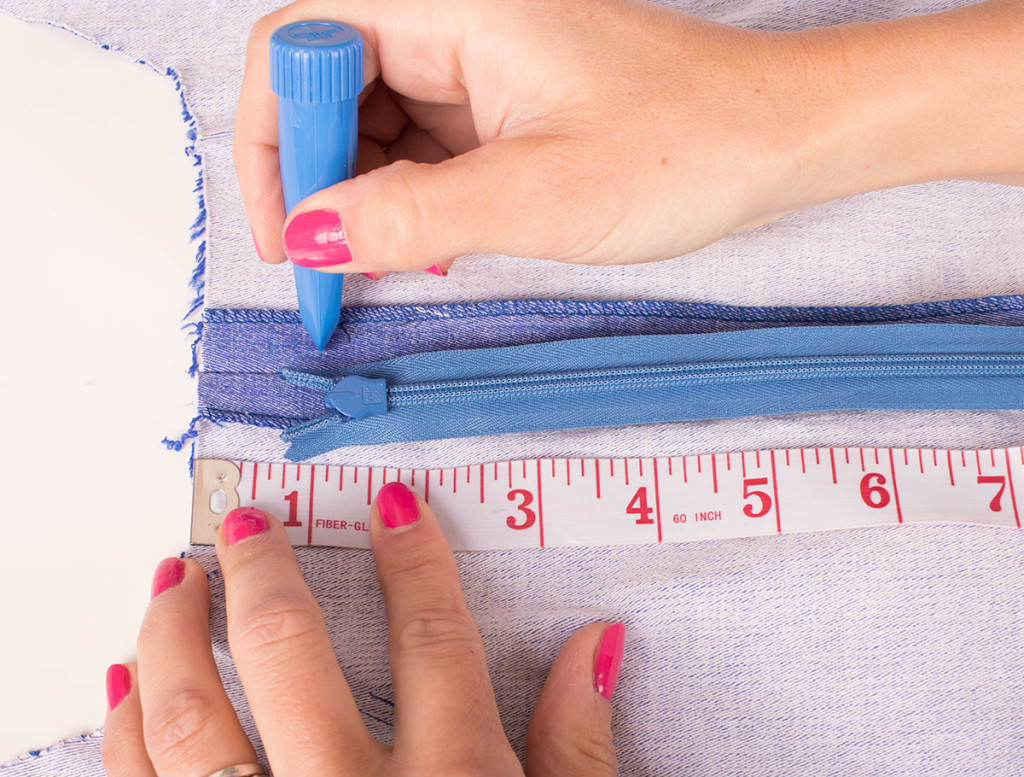
Also mark where you want your zip to finish on the seam allowances and zip tapes. This will help you identify where to stop stitching and make sure everything is lining up accurately.
I always like to press the zip tapes flat to help with sewing it too.
Positioning the Zip
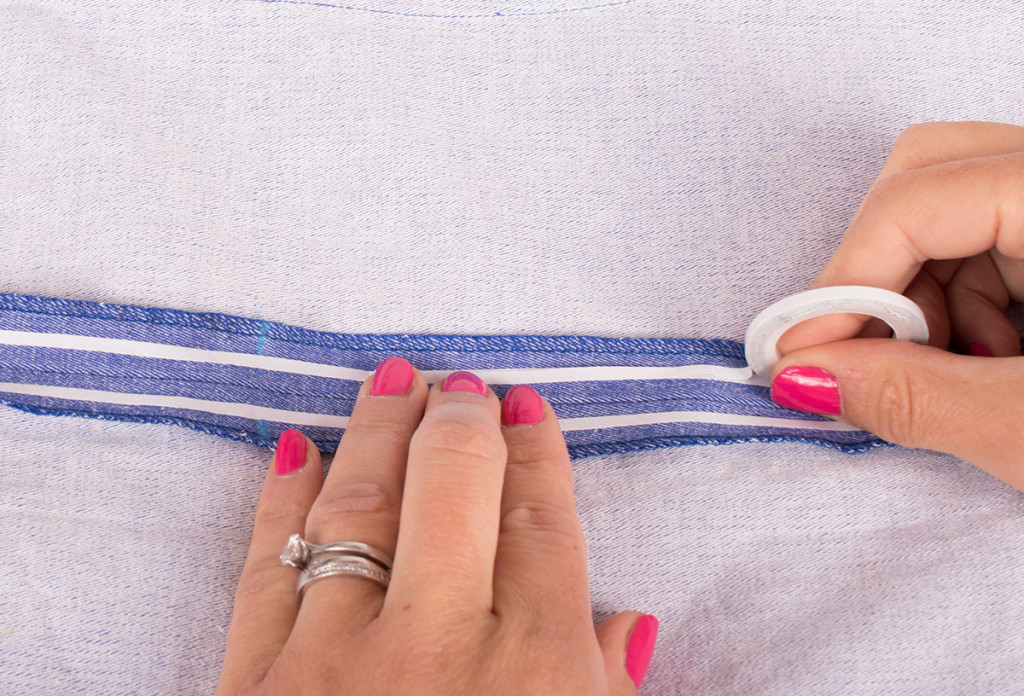
Now it is time to temporarily fix the zip in place ready for sewing. I like to use wonder tape for this job. It is a double sided transparent tape. I find it much easier than pins and it is also easy to reposition the tapes if you go wrong. You can use your chalk markings on the zip tapes and seam allowances to make sure everything lines up accurately.
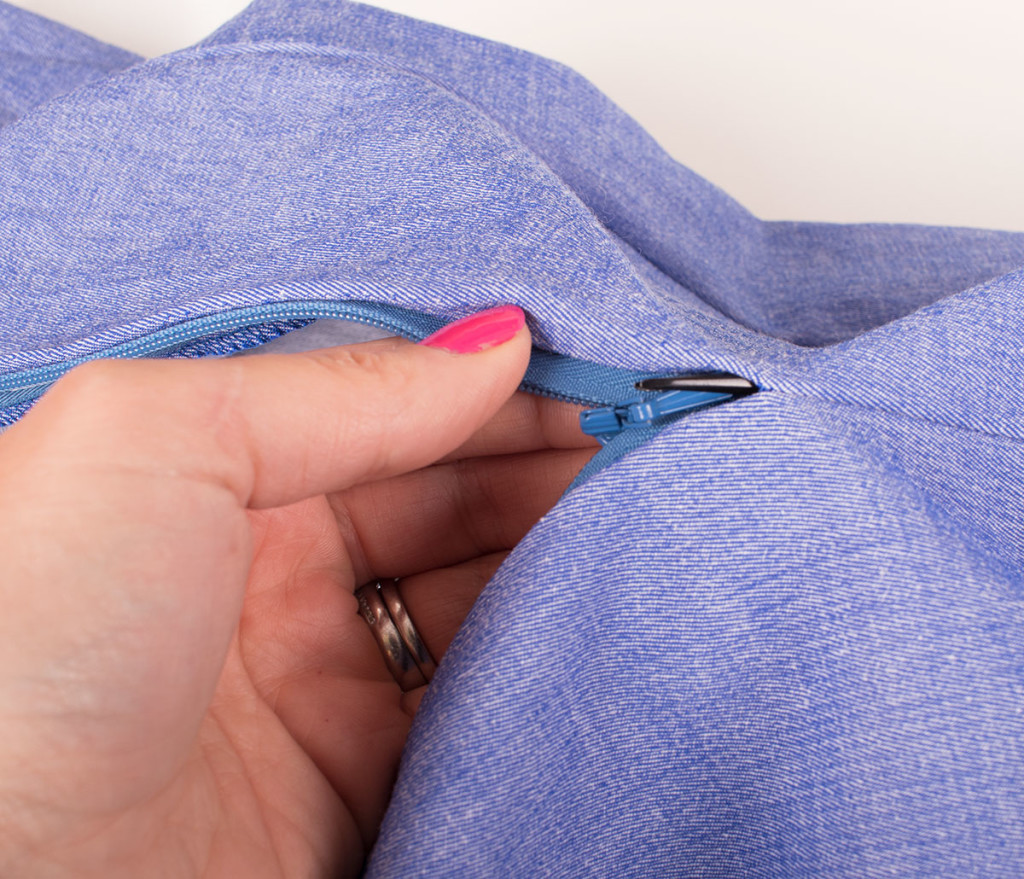
As you position the closed zip along the seam ensure the centre of the zip lines up with the seamline.
You can also hand tack the zip tapes to the seam allowances if you wish. This isn't absolutely necessary, but will ensure absolute precision with positioning as you sew.

Next unpick the machine sewn long tacking stitches along the centre back seam.

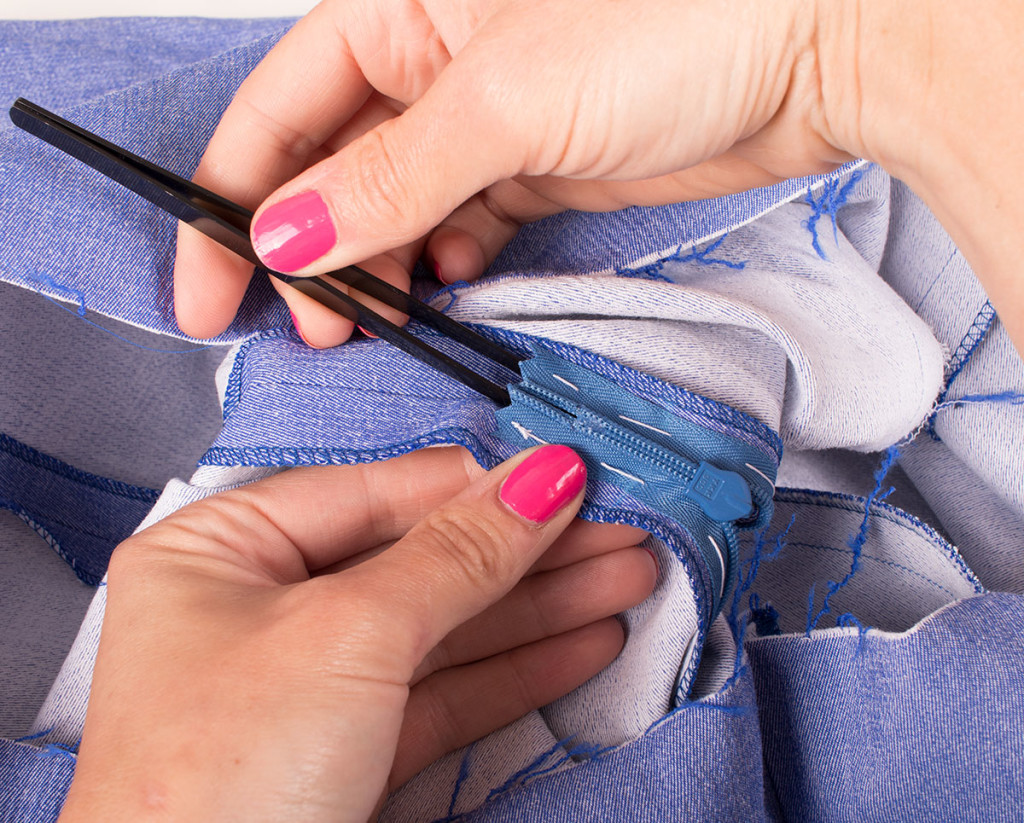
Now for the really clever bit! Open the zip to the point where the standard length machine stitches start and slide a long pair of tweezers or a hemostat between the loose excess zip andthe little gap in the fabric.
Grasp the zipper and pull it down until you can grab it with your fingers. If using tweezers you may need to push it down from the other end to get it through.
Here you can see what I'm doing from the right side:-
And the wrong side:
Pull the zipper all the way to the end.

Sewing the Invisible Zip
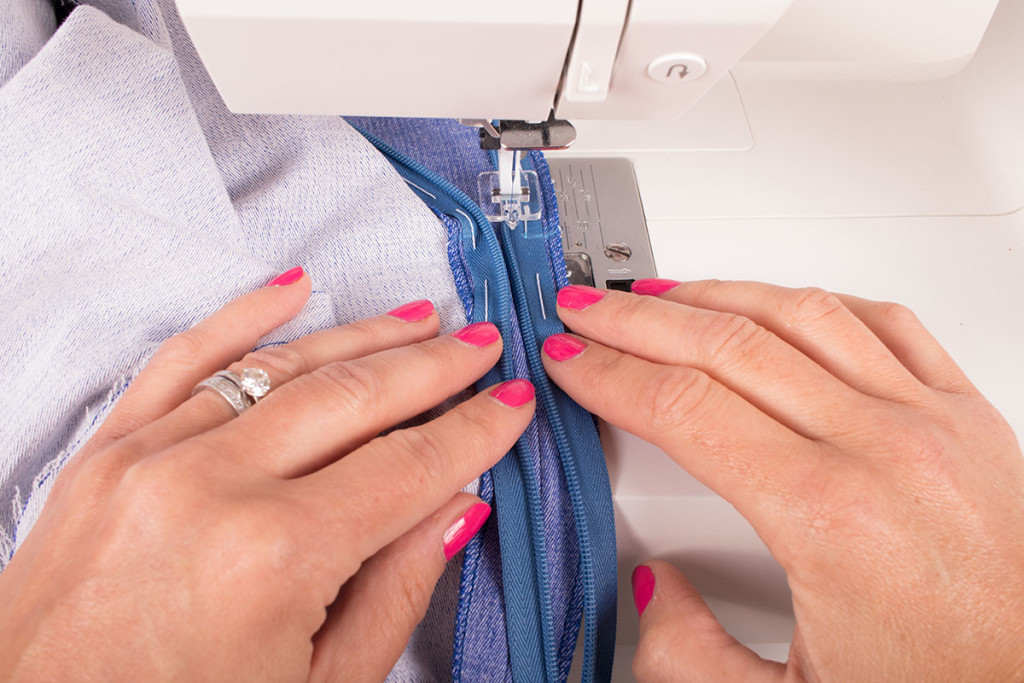
Next sew the invisible zip into place in the normal way.
I like to use an invisible zipper foot to get nice and close to the teeth. (This specific foot is only compatible with certain makes and model of sewing machine, please check our compatibility charts to find the right part for your machine).
You will need to change your needle position for each side and it can be useful to make a note of the setting you use for each side for future reference.
Make sure you sew just past where you want the zip to end, about half an inch or so using the markings you made earlier as a guide.
You will notice how much easier it is to sew to this point thanks to the zip pull being out of the way.
Now it's time for the magic.
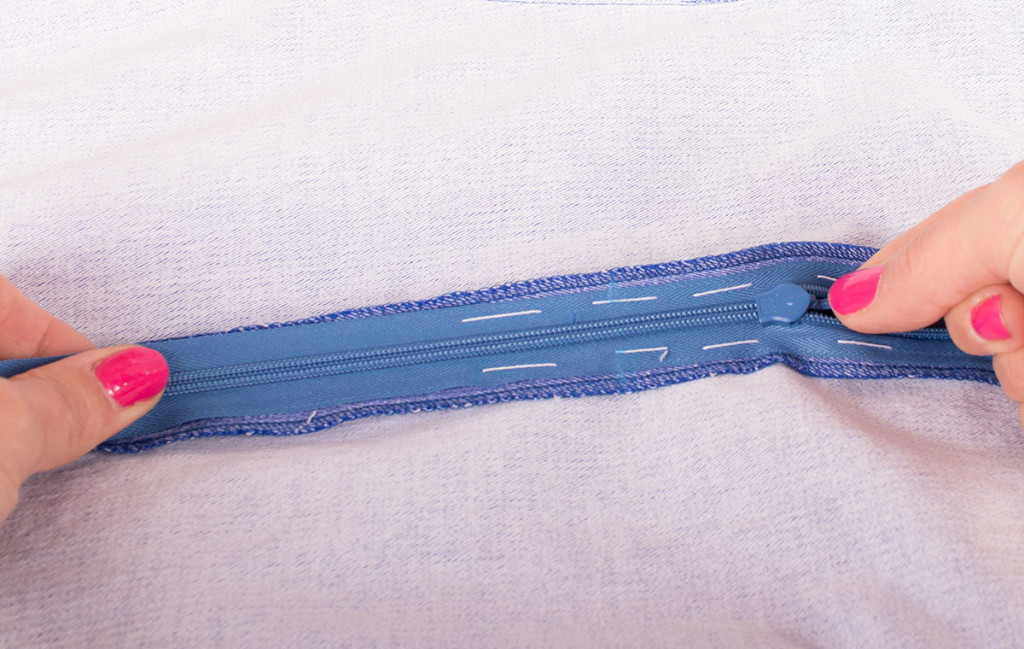
Grab the zipper and pull it all the way to the top of the garment in one simple move et voila your zip is sewn!
There's no need to try and close the gap between where the zip finishes and the seam starts, you've already done it!
To shorten the excess zip length simply sew some zig zag stitches across the zip where you want it to end to create a new stopper then snip the ends off with your scissors.
You will be left with a lovely neat zip - no bubbles and no stress!
We hope you've enjoyed this super tip as much as we have!
Have fun sewing!
Lucy
For more tips and tricks on how to make sewing easy you can follow our blog via Bloglovin and receive updates via email each time a new post is added.
Follow us on Facebook Twitter and Instagram for news, tutorials, special offers, sales and more.
Source: https://www.sewessential.co.uk/blog/how-to-sew-an-invisible-zip/
0 Response to "How to Sew a Concealed Top Zipper Its Sew Easy"
Post a Comment